• Skip to main content
  • Skip to primary sidebar
  • Skip to footer
  • Home
  • About Us
  • Custom Home
    • Luxury Custom Home Builders
    • Modern Custom Home Builders
    • Transitional Custom Home Builders
  • Home Additions
    • Custom Home Additions
    • Dining Room Addition
    • Family Room Addition
    • Rear Additions
    • Room Additions
    • Second Floor Additions
  • Commercial
    • Dental Offices
    • Medical Office Builders
    • Office Renovation Contractor
  • Design Build
    • Design Build Contractors
    • Commercial Design Build
    • Custom Home Design Build
    • Modern Design Build
  • Portfolio
    • Residential
    • Commercial
  • Media
  • Contact
  • Blog

Heidan Construction

Blog

April 26, 2017 By Webmaster

Making a Grand Entrance to Your Luxury Home

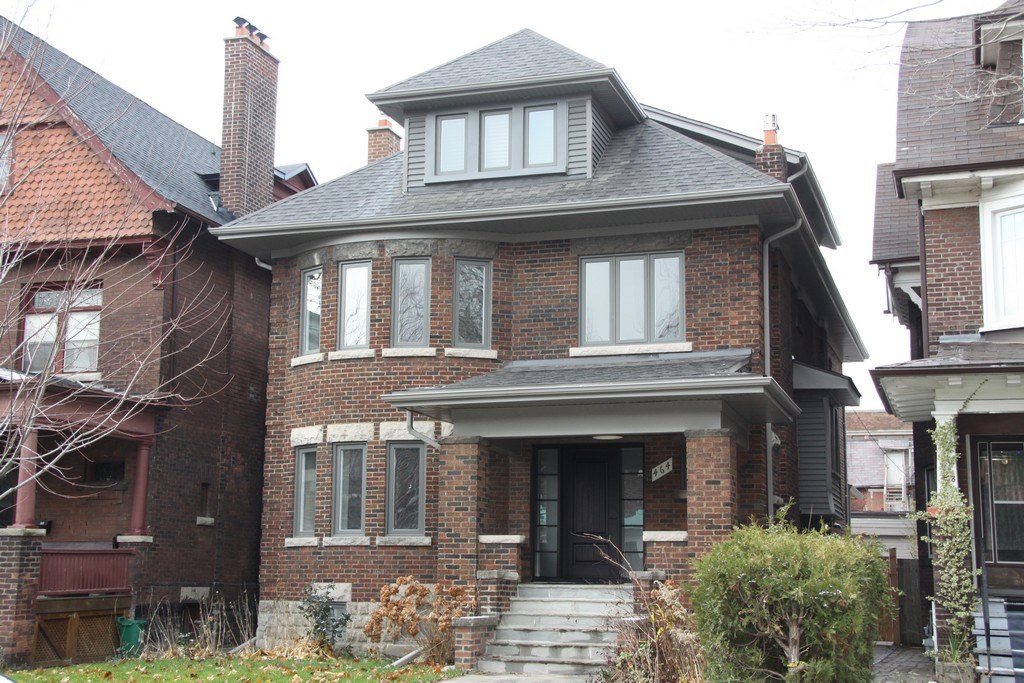
Exteriors - St. Clements Avenue


When you look at all the luxury homes you’ve drawn inspiration from, you’ll probably notice that many of them are designed to take people on a wondrous journey from the front yard all the way to the deepest rooms in the house. That’s a concept to keep at the top of your mind when you think about designs for your house exterior.


The journey begins with the front yard:


Landscaping

With your front yard being the closest to the curb, it’s the landscaping that first draws people’s attention to your house. The possibilities of landscaping design are endless. Recently, the idea of functional landscaping along with cultivating useful plants has been gaining popularity. Whatever design choices you decide on though, make sure they don’t block the sightlines to your front door. Plants are a great way to create a border along the walkway – just remember to trim them to keep the path clear and the front yard decluttered. If you opt for easier maintenance, consider using potted plants so that you can re-arrange the landscaping whenever you like. You can also further display your personal style by making outdoor sculptures part of the landscaping.


Walkway

Have you ever gazed down an overgrown forest trail that’s choked with more shadows than should be normal in broad daylight and turned away? Most people don’t like to navigate through sketchy, uncertain paths so make sure you have a clear walkway that’s at least 3 feet wide. Rather than the usual concrete walkway, a more striking choice would be a flagstone or brick path to your entrance. If you have a stone exterior for your house, you can even line the sides of the walkway with those same stones to visually guide people to your home. The walkway doesn’t have to be in a straight line either. A winding walkway will allow guests to enjoy more of the landscaping in your front yard.


House front

Now we arrive at the front of the house. One of the easiest ways to make it stand out is with colour, especially when it comes to the front door. First, think hard what colour you’d like your front door to be. This is a fun way to showcase your personality based on the front door colour. After you’ve selected your ideal colour, you can then design the rest of the exterior colour scheme to accentuate the front door colour.

With that filled in, let’s light it up! Exterior lighting is important not only for safety, but also for creating an inviting glow about your house. Make sure the front door and garage doors are brightly lit with sconce lights. For the walkway and driveway, install lantern posts on both sides of the paths so that guests can find their footing in the dark. Use low-voltage, motion-activated lighting to conserve electricity.

The porch is another area you can impress guests. You can do that by using premium materials like tile or through architectural finishes like columns and mouldings. Again, the design should enhance the front door and not draw focus away from it. You may also want to build an awning above the porch to protect guests from the elements. This also means you can have your morning coffee or evening mug of hot chocolate outside on the porch even when it’s raining.

Perfection is in the details so don’t forget about the hardware. Make sure they match one another in material and style. This includes the lighting fixtures, door hardware, mailbox, and even the house number. For the finishing touch, put in windows on either sides of your front door to make the entrance seem larger. It’ll also give guests a tantalising glimpse of the warmly lit foyer inside.


Foyer

At last, the door opens and we’re in the foyer. If you have large foyer, place a round table in the centre for a grand hotel lobby effect. With smaller foyers, choose a table that can stand flush to the wall. Shop around for a table that matches the main theme of your interior as it’ll give guests a taste of what to expect in the rest of the house. For a classic interior, choose antiques with a lacquer finish. For modern interiors, marble or glass tables with metallic pedestals are great choices. Place a unique lamp and/or arrange fresh flowers on the table. For the pièce de résistance, hang a framed artwork or decorative mirror above the table. Round out the setting with a plush bench for guests to remove their shoes. Depending on your interior style, you can even combine the bench idea into an antique hall tree.

It’s even better if you have a high ceiling in your foyer because it’s the perfect location to install a chandelier or an artistic light fixture there. Finally, lay down a large area rug at the centre of the foyer floor. It’ll muffle the footstep echoes in the foyer and give guests a cozy feeling early on in their visit.


Once you’ve gotten folks into the foyer, there’s no turning back for them because they’re hooked – they can’t leave now without seeing the rest of the house. And that’s the mark of well-designed luxury home.

Filed Under: Custom Homes, Design Build

April 10, 2017 By Webmaster

Preparing for a Successful Restaurant Renovation – Part 2

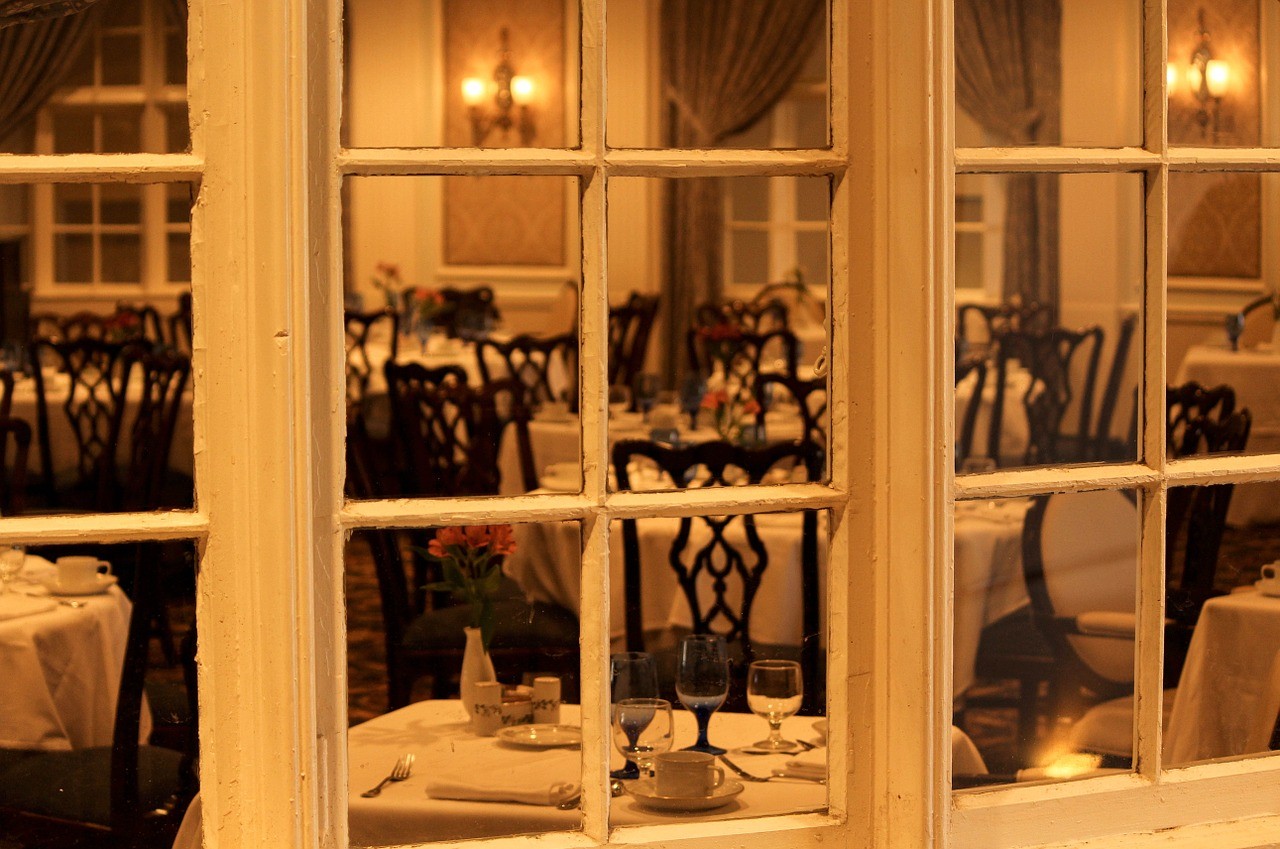
Restaurant Contractors Toronto


Once you’ve figured out what you want for your restaurant renovation in Part 1 of this two-part series, you can start making it a reality:


Team up with the right contractor

It’s important to look for a contractor experienced in restaurant renovations. By now, you already know what you want done, but it takes a commercial restaurant contractor to instinctively understand how to transform your ideas into a functional restaurant space. Communication is crucial in this working relationship so feel free to go in detail about what you’d like to see happen in your restaurant. Make sure to also ask your contractor what their thoughts are on improvements. They can identify what works, what doesn’t, the timelines as well as the estimated costs. Seeking your contractor’s input makes their years of experience a part of your restaurant design.

Keep in mind though that the cost options will always be different from what you expected. To deal with higher costs, honestly ask yourself whether you’re financially comfortable with taking on the difference. If not, work with your contractor to cut back on non-priority ideas. After you’ve arrived at a good number, nail down the renovation timeline with your contractor. It’s best to schedule the renovation during your restaurant’s slow season to minimise the financial impact of lost business on you and your staff.


Putting the money to work

Once you have a solid budget number, adjust the financing amount with the bank. The financing should have been pre-approved by now since you’d started the process with them early on. As soon as adequate financing is in place, confirm with your contractor that renovation work can start at the scheduled time you agreed on. Discuss what materials to order right away. It’s a pain to have renovation held up by waiting on shipments to arrive.


Updates and reinforcing staff loyalty

Update your staff on the renovation timeline as soon as it’s finalised. Post signs around the restaurant for both your staff and your customers on the restaurant’s closing and re-opening dates. Update your restaurant’s website and social media as well with that information.

Find opportunities to talk with all your staff individually and see if there’s anything you can do to help them out while the restaurant is closed. You can go as far as referring them to temporary work for other restaurant owners you know. You can also encourage them to go on a vacation if you already offer vacation pay to your employees. The main point is to start that conversation with your staff and show that you care about how they’re affected by your decisions. Often, that gesture in itself is enough to cement their loyalty to you and even help keep on most of your staff after the renovations are done.


Training day

When it looks like the renovation will finish on schedule, set a soft opening day/night where invited guests are treated to a free meal. Send invitations out to family, friends, investors, associates, and vendors to fill the restaurant to capacity on that date. You can even invite regular customers, too, if there’s space. Mention on the invitation that this is your way of thanking them for their support over the years. Ask for their patience as well during their soft opening experience as your staff is undergoing training. The soft opening will give your staff a chance to get used to the new layout of the restaurant and to the new changes in its workflow. You can also tell whether the renovation changes work well in a simulated peak customer rush. This will give you the chance to smooth out any issues before the grand-re-opening.


Hype up the grand re-opening

While renovations are ongoing, use social media to update your customers on the progress. Take lots of before-and-after photos, too, and send some of them exclusively to the regular customers who took the time to give you renovation ideas in the beginning. As you get closer to the grand re-opening date, ramp up the social media marketing campaign to remind everyone when that is. Again, make your regular customers feel special by inviting them to the grand re-opening and offering them a discount that day. Not everyone will love the new renovation at first, of course, but the special invitation and discount will give them an extra opportunity for the renovation to grow on them. Once that happens, they’ll work just as hard as you to promote your restaurant.


The great thing about taking care of all these details outside of the renovation itself is that you get the best of both worlds in the end. You’ll keep most if not all the people loyal to your restaurant and still give the restaurant a fresh, new look.

Filed Under: Design Build

March 26, 2017 By Webmaster

Preparing for a Successful Restaurant Renovation – Part 1

Restaurant Contractors Toronto


Your restaurant has been your pride and joy ever since it first opened many years ago. Or perhaps it’s been a lifelong dream of yours and you’re now ready to make it come true. Whatever phase you’re at, renovations play a big part in your restaurant business. If you want to always present a fresh face to your customers, you should plan to renovate your restaurant every 5 to 7 years.


Restaurant renovations are tricky to manage though because, unlike home renovations, they affect a lot more people. Not only do you want to improve the restaurant for your customers and staff, but you also want to ensure they’ll stay after the changes. With so many factors to consider, preparation is as vital as the renovation itself.


Let’s break down the preparation needed for a successful restaurant renovation. Here’s Part 1 in this two-part series:


Efficiency by earning your staff’s trust

Renovating your restaurant is not just about the aesthetics – it’s also an opportunity streamline the way it runs. Think about operational issues you’ve been having for the past few years. Are there any bottlenecks in the workflow to fix? Feel free to ask your staff for input on what changes they think would help them do their job better. They’re always in the front lines after all and probably know better than you what needs improvement. By engaging them right from the beginning, you’ll boost their buy-in to the renovation.

It’s also a good idea to reassure them that there’s always going to be a spot for them in the restaurant once it re-opens. Tell them you’ll give them more details on the renovation timeline as soon as you finalise it. Let them know that you’ll also chat with everyone individually to see what options are available while the restaurant’s closed.


The customer is always right

Besides changing the restaurant look to your ideal vision of it, you should always remember the customers who help you stay in business. Study the demographics of your customer base. Are your customers mostly families with young children? Do you get a lot of young and trendy customers? Are your repeat customers more artsy or business class? You should cater to the tastes of your clientele majority and make sure that the new renovation ideas will match their style. At the same time, you don’t want to lose the old charm of your restaurant that keeps drawing your loyal customers back.

So reach out and get feedback from your regulars. Hand them a comment card at the end of their next meal at your restaurant. Explain that the restaurant will be renovated soon and ask them to write down what they like about the current décor and what changes they’d like to see. Invite them to write down their e-mail addresses as well to get exclusive updates on the renovation. You can even give them a discount on that meal to encourage a well thought-out response. Your regulars will appreciate you asking for their opinion and they’ll be much more excited to see the results of the upcoming renovation.


The bottom line in your budget

Take down all the suggestions from your staff and customers as well as your own ideas. Decide which ones are critical issues to fix right away and place them in one list. This is your priority list. The rest of the suggestions are luxuries that will only be considered if there’s still room in the budget and they don’t get in the way of the priorities. Next, go through your restaurant’s finances and figure out the highest cost you’re comfortable with taking on for the renovation. This is also the time to discuss your renovation plans with your landlord. See if you can negotiate to have your landlord contribute some funds or even to take on a percentage of the renovation costs. It doesn’t hurt to ask and some landlords would be willing to do so since it’s their property after all. In addition to your own money and hopefully some of your landlord’s, make sure to also tack on a contingency fund to take care of any unexpected issues that come up.

You now have an idea of what you need and how much you can spend, which is the basis of any budget. You want to hit the sweet spot of making noticeable upgrades to your restaurant’s look and operation, but not so much that they become a runaway train. With your target budget number in mind, start talking to your bank to get the financing approval process started. The final budget may change after talking with your contractor, but that’s easy to adjust further down the road.


Stay tuned for Part 2, where you’ll start off collaborating with a contractor experienced in restaurant renovations.

Filed Under: Design Build

March 11, 2017 By Webmaster

Minimalist Trends in Modern House Design

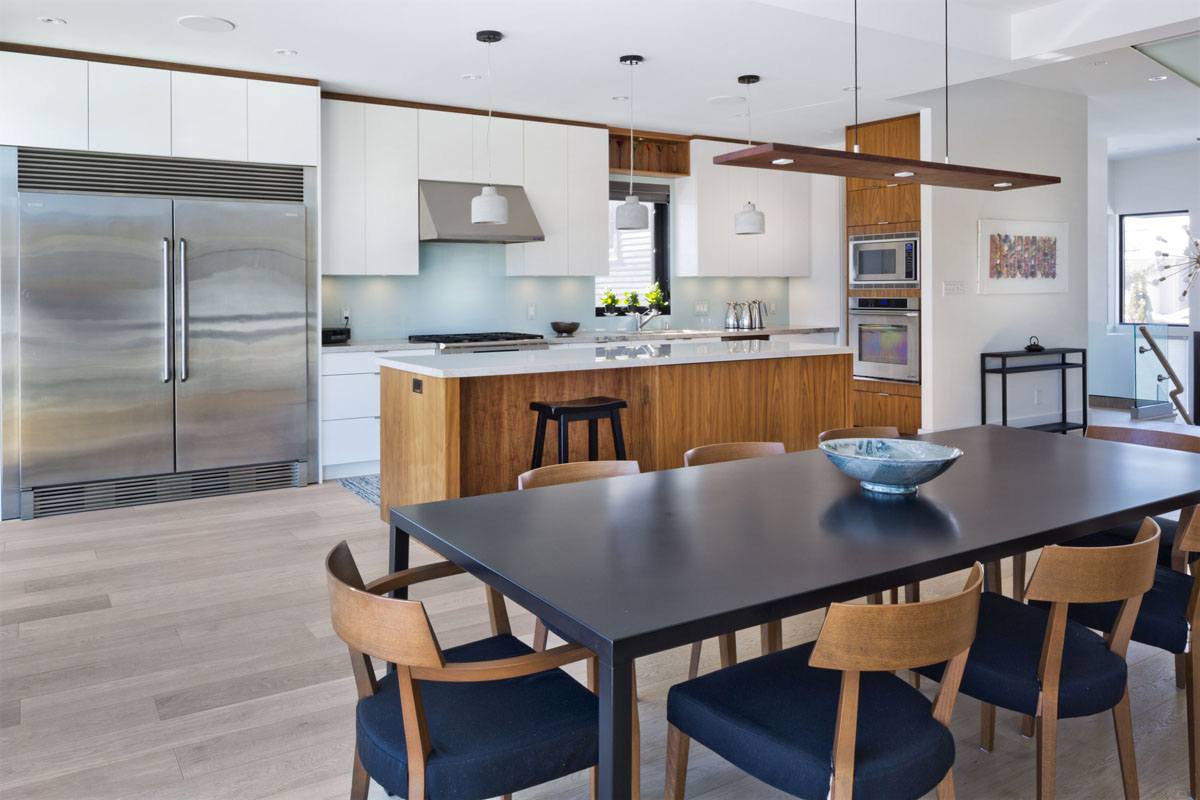
Dunloe Road


The foundation of “minimalism” comes down to one phrase: “Less is more”. Condensed in that one phrase is a broad philosophical landscape wherein art, design, music, and even a way of life has found a home. So it was only natural that when house design needed a new expression in the modern age, minimalism was there to welcome it with open arms.


The introduction of minimalism to house design can be traced back to British designer John Pawson when he released his book, Minimum, in 1996. With that, minimalism became the defining image of modern house design. Every designer and architect has a slightly different take on minimalism, of course. Even so, you can find common minimalist trends in many modern house designs nowadays:


Function as primary objective

Minimalism strives to simplify life to its essentials. In doing so, every object and feature must then serve a specific function in the design. Whether it’s for utilitarian purposes like the least number of chairs needed in the room or for aesthetic purposes like accentuating a piece of artwork, everything is there for a reason. Nothing is extraneous.


Open spaces are not emptiness

With the choice of each item so well thought-out, space starts to open up everywhere. But far from being mere pockets of emptiness, these open spaces are maintained for the most important function of all: giving you the room to breathe in complete content. And that is definitely not emptiness.


Simplicity of neutrality

You’ll often see a lot of minimalist spaces that primarily use neutral colours of black, white, and/or grey. Some people may look at that as boring or even cold. In the eyes of minimalism, however, it’s the ultimate representation of simplicity. There are no kaleidoscope of colours, no cacophony of overlapping hues, no veiled tones you’re supposed to pick up on. What you see is what you get. It’s a return to innocence where everything is black or white or both in the form of grey. It’s simply a world without complications.


Bursts of intentional colour

Minimalism doesn’t mean shunning all non-neutral colours though. It’s about choosing your colours carefully and using them with intent. And when your base colour palette is neutral, any burst of colour you add to the space will speak volumes. The intentional use of colour then becomes a powerful statement that stands out as opposed to lost in the chaos of competing colours.


Balance of textures

So, if colour is to be used sparingly, how do you distinguish between zones in a space? Textures. Mixing and matching textures will allow you to bring balance to a space of few colours. That can take form in different materials or patterns for the walls and floors. You can also make use of area rugs or even throw pillow covers. Just don’t go overboard by adding too many layers of complexity in textures though. Always design from the perspective of function as the primary objective.


Lines flowing into curves

With all the space that minimalism opens up, the straight lines of a room become all the more apparent. A design trick often used to soften the sharp angles is setting down furniture with smooth, organic curves. As our eyes travel from the lines to the curves, our pattern-seeking brains will work their magic to blend them together. This is what binds everything in one cohesive space where zones flow seamlessly into one another.


Floating shelves, hidden hardware, and streamlined lights

The seamless illusion is also supported by small details like floating shelves, hidden cabinet hardware (e.g. push latches or recessed handles), and streamlined or stripped down light fixtures. It’s hard not to gush over features that seem to just materialise out of the wall or ceiling.


Centred by art

Designing a house is always an art, but the careful scrutiny of each minimalist design feature feels especially like an art masterpiece. It’s no wonder that many minimalist spaces often highlight an artwork or photograph print centrepiece as the focal point.


Wall of the jungle

Greenery can play a part too in the sleek modernity of minimalist spaces. In fact, it’s a perfect embodiment of the minimalistic spirit; after all, what can be simpler than returning to the roots of nature?


Every feature is crucial in a minimalist space and requires a solid design to ensure function and aesthetics work as one. We can help bring simplicity back to your life.

Filed Under: Custom Homes

February 28, 2017 By Webmaster

How to Apply Feng Shui to Your Office Renovation

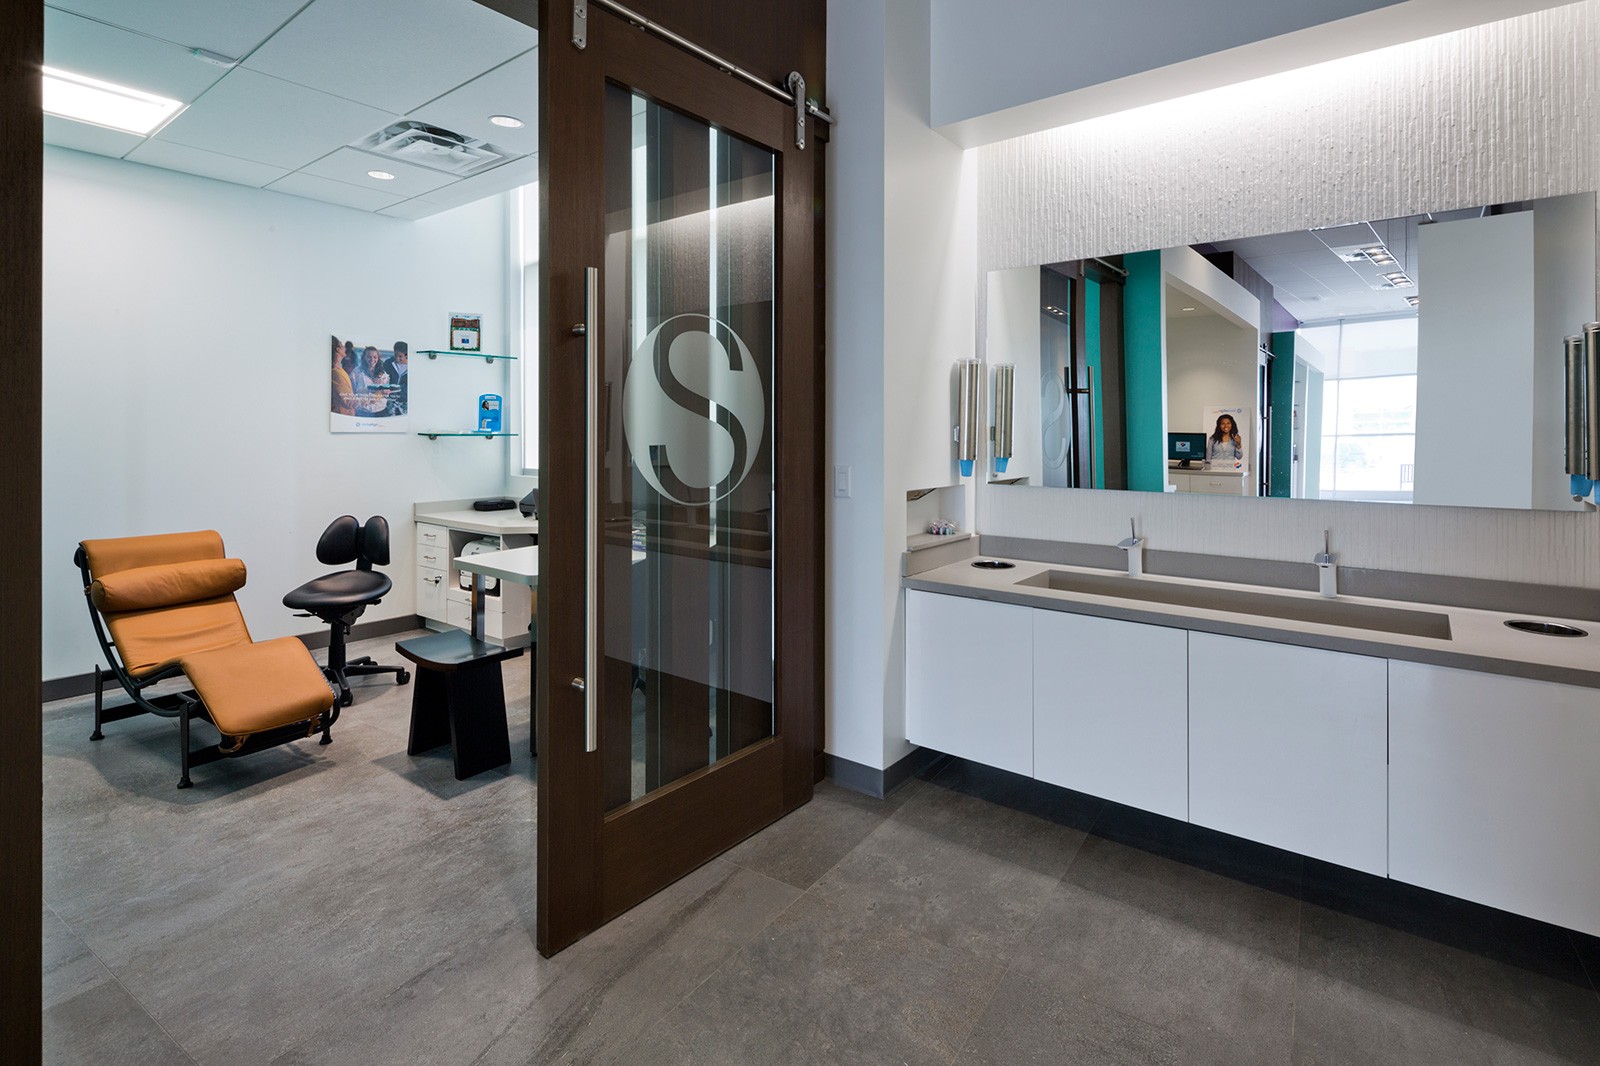
St. Clements Avenue


You always hear people say, “Keep up the good vibes,” but what does that even mean, really? Often, it’s about changing your outlook on life so that you’re not too bothered by the small things that come at you; other times, it may mean adjusting your environment to make things smoother.


We spend about 7.5 hours in the office every weekday – sometimes even longer if there are deadlines to meet. With such a large chunk of our days spent there, it makes sense to optimise the office so that you and your employees can work together in comfort. One way is to integrate feng shui into your office design. Feng shui is the Chinese philosophical study into promoting harmony between people and all elements of their environment. Literally meaning “wind water” in Chinese, feng shui has become increasingly popular in applications both at home and at work.


What are some of the ways feng shui can be applied in the office though?


Warm, vibrant colours

Warm colours generally fall anywhere between the red and yellow spectrum. You can spread these colours throughout the office either through wall paint, artwork, or even furniture. Sometimes, however, it’s not possible use warm colours in the office because of company branding or productivity colour influences. Besides, you personally may not even find “warm” colours all that warm – and that’s okay. The point is to liven up the workplace through colours that you and your employees feel are vibrant. If you’re not limited by company branding or productivity goals, start a poll among your employees for ideas on the most popular, vibrant colours.


Light

Having enough light – both natural and artificial – is very important in the office because it’s one of our main sources of energy. Invest in large windows so everyone gets ample natural light, but also make sure to install lots of warm, ambient lighting. You can supply offices or cubicles with individual and/or hanging warm-spectrum lamps if employees need extra lighting at their work space.


Feng shui energy areas

This is where things start to get a bit technical in feng shui. Essentially, different areas in the office represent certain elements and aspects in life. To encourage success in those aspects, you should decorate those areas with complementary objects. For example:

  • Fame and Reputation: Located in the south area of the office and represented by the Fire element. You should mount your company logo here and keep the area brightly lit. Avoid water-related objects, mirrors, and the colour blue here since they’ll counter the Fire element.
  • Career, Business, and Life Path: Located in the north area of the office and represented by the Water element. You should put up images – in black or white metal frames – that are inspiring to your business. You can even display a project model here. Basically, anything that speaks to your business aspirations or goals should be placed in this area. Water-related objects can go here, too.
  • Prosperity and Abundance: Located in the southeast corner of the office and represented by the Wood element. You should place plants and especially water-related objects like a fountain here to nourish the Wood element. Images or symbols of wealth (e.g. jade sculptures or crystals) go well here. Avoid objects related to fire or metal, which counter the Wood element.


Desk positions

How you position your desk is also important in office feng shui. It may be difficult to optimally rearrange every desk, but it’s something worth trying so that you get total harmonious flow in the office. At the very least though, the desk of the CEO – as the leader of the company – should be carefully positioned with feng shui in mind. These are the main feng shui principles for desk positions:

  • Seeing the door: You should be able to see your office door with ease while sitting at your desk. Try not to have your back to the door; if there’s no way to avoid that, strategically place a reflective surface by your desk that allows you to see the door that way.
  • Strong backing: There should be a solid wall behind you instead of a door or window; if that’s not possible, mitigate that with a row of large, healthy plants behind you.
  • Unblock facing wall: If you end up facing a wall, cover it up with artwork, bookcases, or inspirational images.
  • Avoid sharp corners lines: Make sure you’re not sitting in the line of any sharp corners from other office furniture.


Plant life

Add life and fresh air to your office with indoor plants known for cleaning up air quality. These plants are especially effective at doing that: bamboo palm, Boston fern, English ivy, peace lily, and rubber plant.


As with any makeover, the best time to do it is when you’re ready to start from scratch in revamping the whole thing. It’s quite easy to apply these feng shui principles to your office while you’re planning out your office renovation. Here’s to wishing you a prosperous business!

Filed Under: Blog

February 11, 2017 By Webmaster

15 Tips to Avoid Damage to Your New Luxury Home When Moving In

St. Clements Avenue


We’ve all been through a move at some point in our lives. Unless we’re using a professional moving company though, it’s actually a bit funny in a shake-your-head kind of way how we never seem to learn from the mistakes of our last move. We don’t realise we’re messing up the same way until we’re on the other side of the doorway with our face pressed against the sofa, screaming at the person on the other end to tilt the stupid thing.


So, for the sake of breaking that cycle right here and now, check out these 15 tips to avoid damages while moving into your new luxury home:


Plan out the move-in order of heavy objects

Most of the headaches that come with moving can be alleviated by actually sitting down and planning the whole move out beforehand; in fact, pretty much 87% of these tips here are pre-move preparation steps. In this first step, it helps a lot if you have a basic map of the room layout in your new house. Figure out what heavy objects (i.e. anything that needs to be carried by two or more people) go in which room and label them with “1”, “2”, “3”, etc. (with “1” being the object that goes in the room furthest away from the entrance). That way, you’d minimise the amount of haphazard, double-back traffic you have to make during the move; the more efficient beelines you make, the less risk of unnecessary damage during the move.


Get your crew together

Make sure you confirm with the friends and family who are helping you that they’re available on the date and time of the move. Count the number of confirmed helpers and see if you have enough; at the very minimum, you should have enough people to carry the heaviest object you have on the move. A day before the move, remind everyone again on the meet-up time for the move.


No-shoes policy

One of the best ways to avoid damage during the move is to minimise the amount of dirt and sand that’s tracked throughout your house. They create friction and will quickly scratch up your floors with all the back-and-forth moving traffic. What you can do to prevent that is to ask people to take off their shoes before entering the house. If you do decide on a no-shoes policy during the move though, make sure to tell everyone in advance to bring shoes that are easy to slip on and off.


Measure doorways in advance

This ensures all your large and heavy objects will actually fit through each doorway so that you avoid the all-too-familiar scenario described at the top of this article. Or this one.


Take apart large furniture

It’s great if some of your large furniture can be disassembled and carried piece by piece to make the move easier.


Empty out the contents from drawers and appliances

Again, this will make it easier to move your furniture and appliances as they won’t be so weighed down with stuff inside.


Clean and dry appliances

It’s very difficult to get a grip on appliances when they’re greasy. Clean them all up and make sure you dry them, too; they’ll be much less slippery during the move. Plus, it’ll be nice when you finally settle in the new house with already sparkling clean appliances.


Tape drawers shut

This will give you the freedom to tilt the furniture however you need during the move and not have to worry about the drawers opening to take out people’s knees or to mark up the walls.


Pad large furniture and appliances

Tape blankets or thick layers of newspapers around the sharp corners and edges of large furniture and appliances.


Attach felt or cardboard pads

These small pads attached to the bottom of appliances and furniture feet will lessen the likelihood of scratching your floors.


Cover up the walls

Hang up thick cloths or cardboard to protect the walls along narrow hallways and rooms or at least the areas that’ll encounter the highest moving traffic.


Cover up the floor

Tape down carpet runners or plastic sheets to protect the flooring of high-moving-traffic areas like the hallway. Sweep out all the dust and dirt before taping down the floor protectors though.


Clean the floor

Sweep the whole house to clear away all the sand and dirt and then use a damp mop on the bare floors to keep the dust down before the move.


Use furniture glides

During the move, place furniture glides at the bottom whenever you need to slide heavy furniture or appliances across the floor. On hard floors, it’s best to use Masonite, towels or carpet pieces as furniture glides; on carpet, cardboard is more effective.


Don’t use the “pivot” method

The “pivot” method – dragging one side of a heavy object across the floor in the direction you want to go and then dragging the other side – may seem more effective, but it’ll actually damage your floor more. By dragging on the one side each time, you’re actually piling on a lot more force on one side and the uneven distribution of that force will cause that side to dig into the floor more as you drag it. Always try to slide the whole thing uniformly across the floor; don’t be shy to get the whole crew to pitch in to achieve that smooth glide.


These tips should help keep your luxury home safe from harm while you move in. After all, you’ve spent months watching it transform from dream to reality; it’d be heartbreaking to see it damaged right off the bat on moving day.

Filed Under: Blog

  • « Go to Previous Page
  • Page 1
  • Interim pages omitted …
  • Page 31
  • Page 32
  • Page 33
  • Page 34
  • Page 35
  • Go to Next Page »

Primary Sidebar

Residential Projects
Commercial Projects

Contact Us


    Footer

    550 Eglinton Ave. W PO Box 38059
    Toronto Ontario M5N 3A8
    TEL: 416-543-2945
    EMAIL: info@heidanconstruction.com

    Copyright © 2025 Heidan Construction Ltd.